Happy Monday! Today I want to share my method for meal planning by using my bullet journal. If you’re interested in seeing more of my journal, check out the Bullet Journal category of my blog!
I started meal planning around 2 years ago when I got frustrated that I was ending up having to throw out food because I bought more than I could eat before it expired (and I never remember to freeze things until it’s too late). At first it was very casual – making my grocery list based on meals and sticking to the list at the store. Over time, I started to notice what meals I liked the best, cooked most often, and were easiest (fastest) to make, and from that list of go-to meals, my meal planning system was born!
I only meal plan, I do not meal prep. That is something that’s never worked for me, mostly because I hate 90% of leftovers! We’ll see if that changes as I get older and have a larger family to cook for. For now, purchasing things with portions in mind is working perfectly.
The planning pages in my bullet journal consist of 2 full spreads:

Go-To Meals
I use restickable flags to list out the most frequently cooked items and meals. I color-code the items like so:
- Hot Pink – Chicken
- Golden – Beef
- Green – Pork
- Blue – General Meal
- Purple – Sauces/Seasonings
- Orange – Sides
- Light Pink – Leftovers
If you examine this too closely, you may notice that I am a bit of a picky/plain eater, but my husband and I are working to incorporate more veggies! I’ve even added a couple veggie “sides” flags since this photo was taken.
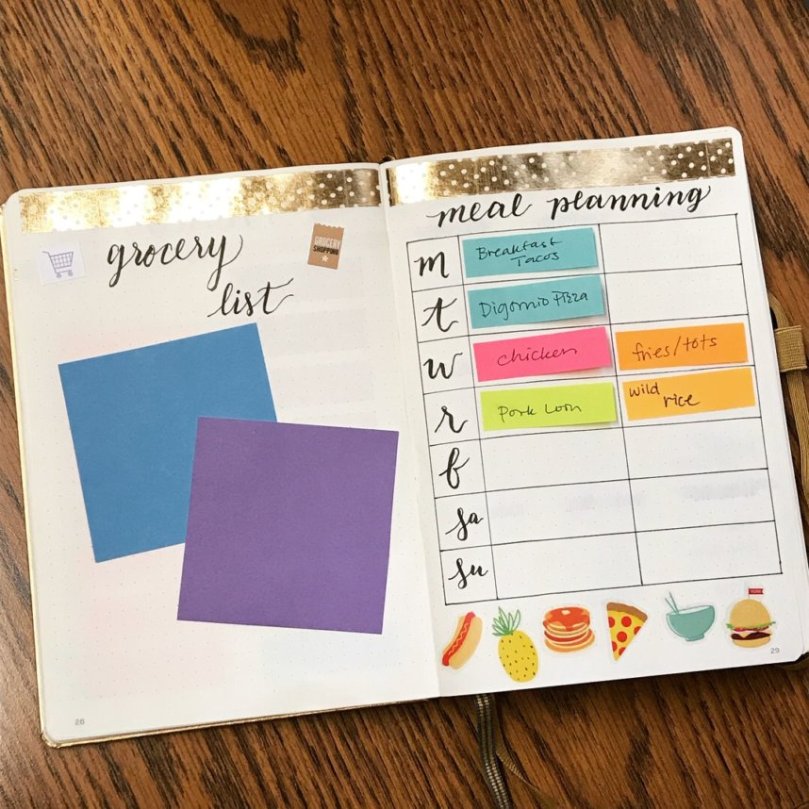
Grocery List & Perpetual Planning Page
Turn the page, and I have a space where I keep a few larger sticky notes to write down my grocery list. On the opposite page is where I move my flags around to plan out my meals for the week. I only meal plan for dinners, since I eat basically the exact same lunch every day.
Sometimes the flags overlap, like if I was making lemon pepper chicken with broccoli, I’d have a “chicken” and the “lemon pepper” tabs in the left column and the “broccoli” tab in the right column. I used to do this with different styles of pasta and pasta sauces, but I realized it saved space and made more sense for me if I just had the 3 main sauces on tabs, like “pesto pasta” instead of “pesto” and “fettuccine”.
I really like the adjustable nature of the sticky flags because things come up that change what you need to eat each night! For example – this week we had planned to make a pizza one night, but our family made dinner so I just moved the pizza flag back to the Go-To Meals page. I like to plan for at least one frozen-based meal during the week to give more flexibility. It’s always helpful to be able to ask my husband to just toss in a pizza if I get home and am too tired to cook! (Also this week we’ve only planned through Thursday since I’ll be out of town over the weekend.)
Admittedly, this is nothing new. Many people use restickable flags to meal plan. I think figuring out what works for you in any sort of planning situation is more about how you get to your perfect system than where the idea came from. So to whatever awesome person out there subliminally inspired me via Pinterest – THANK YOU!
To back all of this up, I also write in what I ate every day in my weekly spread. This way, I can look through my journal later on and see what meals get made most often and if there’s any new meals to add to the Go-To page.
I hope this post helps you develop a way to meal plan in a way that works for you. Please share your meal planning spreads or posts in the comments!
How do you tackle meal planning? What are your favorite easy meals to cook during the week?
– Natalie
(Stickers on pages above are from the Create 365 The Happy Planner Basics Value Pack.)
P.S. Here’s some referral links to some of my favorite sites. Use if you’d like!
- Ebates – This is a great way to earn cash back from online shopping (that you’re already doing) at many of your favorite stores! (Including Sephora & Ulta!) If you join through this link and make a purchase of $25 or more, you’ll get an extra $10 cash back and I’ll get $15, as well as your own referral code.
- thredUP – I love using thredUP to clean out my closet and shop for new pieces at a discounted price – sometimes they’re even brand new with tags! When you join thredUP through this link, you get $10 to spend and I get $10 to shop after you place your first order.
- StitchFix – This is a great way to try out some new items for your closet, without the hassle of going to the stores and the bonus of a personal stylist. If you sign up with this link, you’ll get a FREE styling fee (usually $20) on your first Fix, and I’ll get $25 credit once it ships.
